


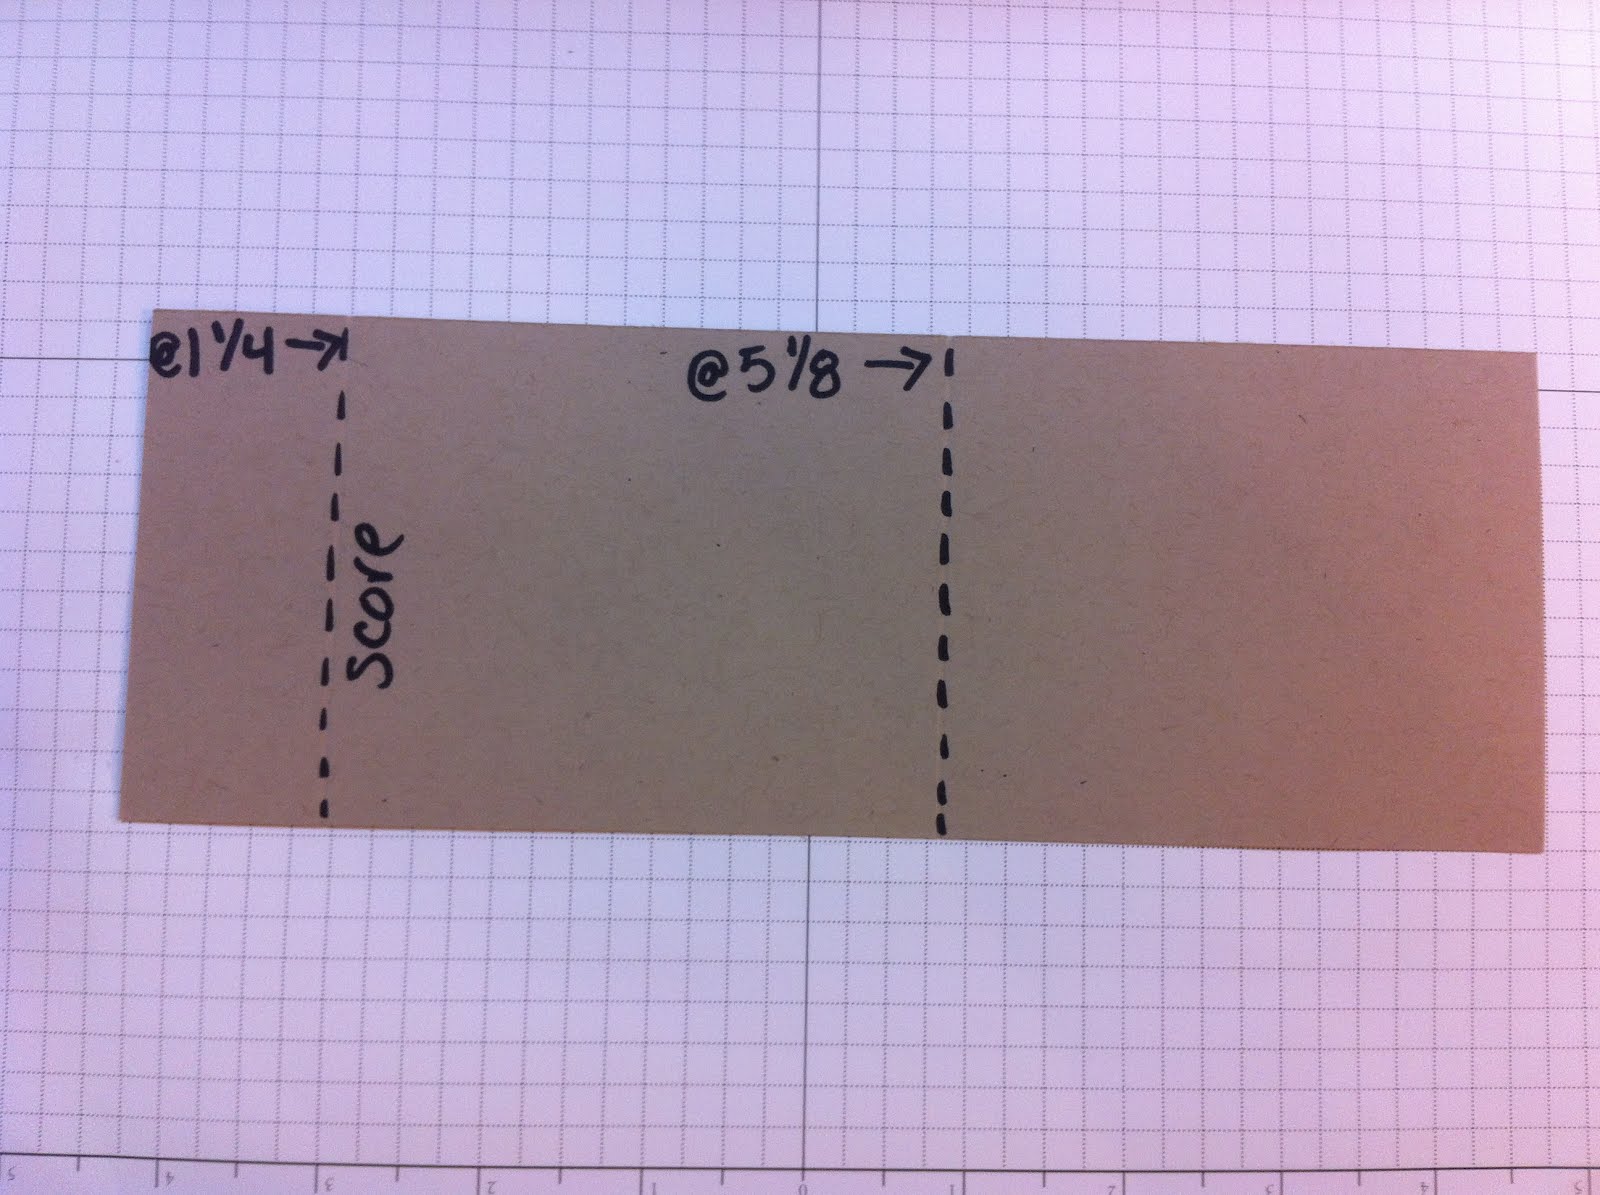
- 1 Kraft Card Base (measures 3 ¼ x 9, scored at 1 ¼ and at 5 1/8)
- 2 White Card Stock 4 ¼ x 5 ½
- 1 Tag
- 1 Orange 3 ¼ x 1 ½ (for scalloped border punching)
- 1 Green 1 1/8 x 3 1/8
- 1 Pattern Piece 1 x 3
- 1 Kraft 2 7/8 x 3 3/8
- 1 Orange 4 x 2 ¼
- 1 White 2 1/8 x 3 7/8
- 1 Embossing Folder
- 1 Distressed Stickles in Scattered Straw
- Flower Stamp of choice
- Black ink
- Copic Markers color of choice
- Frayed Burlap Distress Ink for inking edges
- Corner Chomper
- Strip of turquoise ribbon
- Twine for tag
- Pop Dots
- Scalloped Border Punch
- Paper Trimmer
Directions:
1. Fold your Kraft Card stock Base at the score lines.

2. Your shorter side will be in the back and the longer(including the little flap) will be on the front. Take a ruler and draw your lines up from the bottom to the top corner of the score line. Then use your trimmer to trim that piece off.


3. Take the other piece of Kraft Card stock and then do the same thing to create the inside portion of the cover. Then you are going to use your paper trimmer to trim the pieces off.


4. Run that piece through the big shot with an embossing folder. Then ink the edges of all pieces with the frayed burlap distress inks. Glue down that piece to the front of the card.


5. Take the small piece of orange card stock and punch the border with the border punch. Glue it to the bottom of the flap. Ink the edge with the frayed burlap distress ink.
6. Ink the edges of the Green piece and the pattern piece with the distress ink. Then glue the Green piece and the pattern piece on top of the flap.
7. Take the Turquoise ribbon and wrap around the top of the flower pot. (looks like the rim) Tie it in a pretty bow.
8. Ink the edge of the tag with the distress ink and stamp the word “SMILE” onto the tag. Use the Twine to tie it onto the turquoise ribbon.
9. Stamp the Flower stamp on both pieces of the white card stock. Color in with the markers provided. (on one of them you only need to color the center flower as you are going to cut it out and pop dot it up on the other piece when complete. When you are done coloring you will need to cut out the complete setting of one and then only the center flower of the other one. Pop dot it up on top of the main grouping of flowers.
10. Corner Round the remaining orange piece and the white piece of card stock. (Just the bottom) Then glue them on top of each other creating a mat.
11. Take the Flower grouping and pop dot up on the top portion of the tag. Only along the top of the tag put the pop dots. Then layer the flower so that it sets nicely in the flower pot.
12. Put your flower tab into the flower pot.
You are finished with your card.
I'm a gonna try this! I love you sweetie.
ReplyDeletemom